 Pin
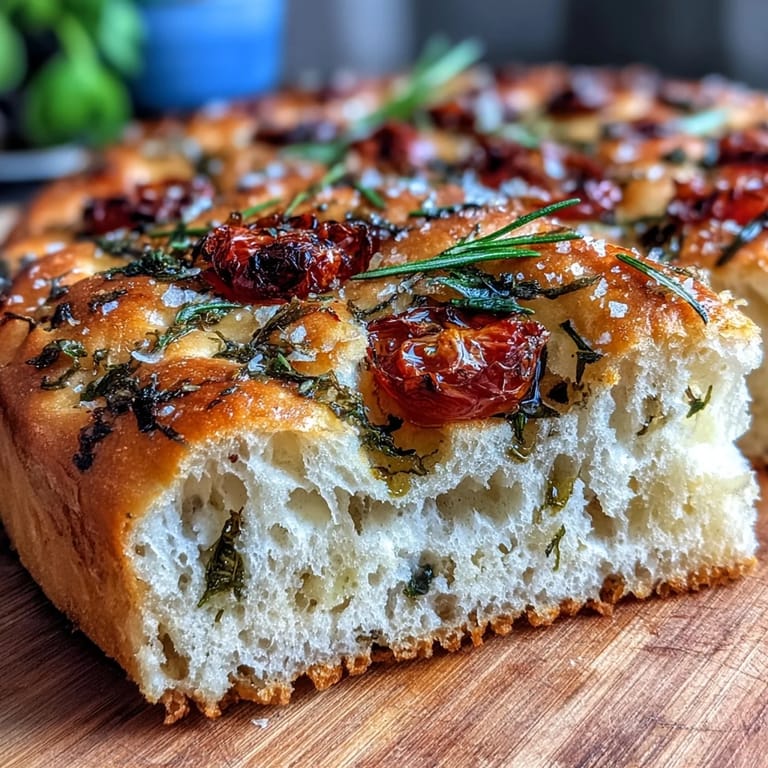
Pin Some Saturday mornings, the kitchen just calls for a project that feels alive. Last April, still yawning and barefoot, I started prepping focaccia only to realize the breeze was carrying in scents from the tiny herb pots on my windowsill. Suddenly, baking this bread became less about the recipe and more about letting spring in through the open window. Standing there, hands dusted with flour and sunlight streaming onto the counter, it felt impossible not to smile. The tomatoes, just beginning to blush with early season sweetness, nearly leapt into the dough all on their own.
The first time I made this for friends on a rainy spring evening, I forgot to time the first rise and panicked when I realized it had gone almost two hours. When we finally ate, huddled around the battered baking tray, nobody cared about the wait—the smell of warm bread and thyme made most conversation pause in wonder. The crumbs trailed across our plates long after the last slice disappeared, proof that imperfection can be delicious.
What's for Dinner Tonight? 🤔
Stop stressing. Get 10 fast recipes that actually work on busy nights.
Free. No spam. Just easy meals.
Ingredients
- Bread flour: Using bread flour makes the crumb tender and chewy—don’t swap it unless you need to, and don’t rush the rise if you want those beautiful air pockets.
- Fine sea salt: This blends evenly and melts right into the dough, so every bite is seasoned properly—just don’t confuse it with flaky salt for topping.
- Active dry yeast: That little packet is what makes the dough spring to life; just be sure the water isn’t too hot, or you’ll silence the yeast before it begins.
- Lukewarm water: Let your finger be the judge—a gentle warmth wakes up the yeast without scalding it.
- Extra-virgin olive oil: I learned early that bold, peppery olive oil seeps beautifully into the crust while also keeping the crumb plush—plus, generous greasing keeps the bread from sticking.
- Cherry tomatoes: These burst with sweet-tart juice as they bake, creating little pockets of flavor—pat them dry if they’re extra wet so they don’t make soggy spots.
- Fresh rosemary, thyme, chives, and basil: The fresh herbs aren’t just for looks—they perfume the bread and bring lacy flecks of green to each slice; use what’s fragrant and on hand.
- Flaky sea salt: Try not to skip this—it gives crisp, briny surprises on the crust, but use a light hand so it doesn't overpower the herbs.
- Freshly ground black pepper: Just a crack or two sharpens the top without masking the sweetness of tomato and herbs.
Instructions
- Mix the dry base:
- Whisk together the bread flour and fine sea salt in a large bowl—the simple movement releases a little puff of floury air, which always signals something good is starting.
- Activate the yeast:
- In a smaller bowl, swirl the yeast into the warm water, watching for lazy bubbles and a faint whiff of bread rising—let it sit until the surface turns frothy, about 5 minutes.
- Form the dough:
- Pour the bubbly yeast water and olive oil into the flour and begin mixing—your spoon will meet a shaggy, sticky resistance, but keep going until it just comes together.
- First rise:
- Coax the dough into an oiled bowl, cover with a clean towel, and tuck it into a warm spot—over the next hour or so, it will double in size, softening as it rises.
- Shape and dimple:
- Generously oil your baking tray and gently slide the dough onto it. Oiled fingers will help you stretch it and poke those signature dimples—the dough should feel airy and lively under your hands.
- Second rise:
- Cover the tray again and let it puff for about 30–40 minutes, just long enough for the top to look pillowy and vulnerable to topping.
- Heat the oven:
- While the dough finishes rising, preheat your oven to 220°C (425°F); this high heat ensures a crisp golden crust.
- Decorate the top:
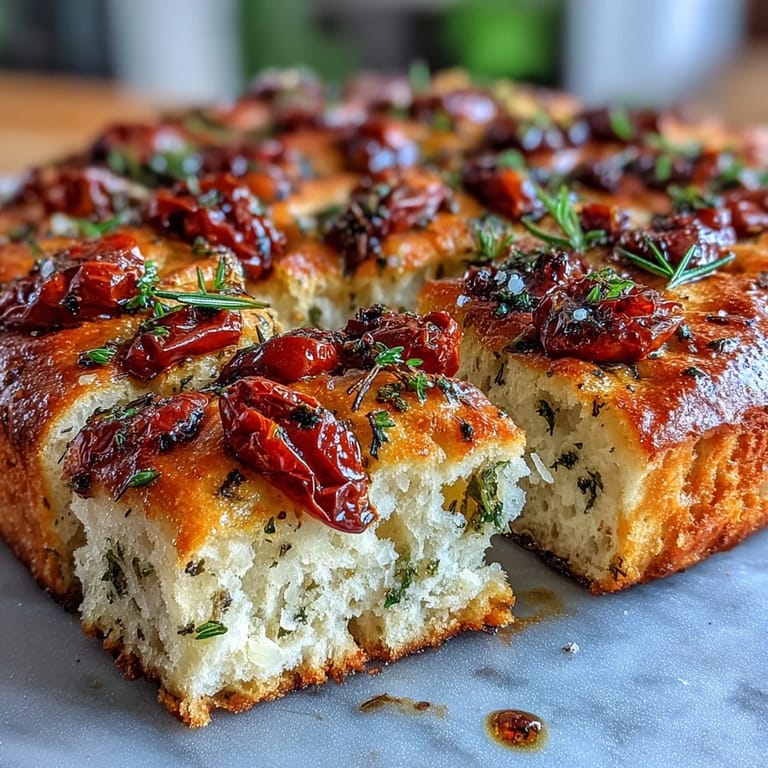
- Drizzle olive oil over the surface, then scatter cherry tomatoes, herbs, and flaky salt, finishing with a twist of black pepper—this is the part that feels like edible art.
- Bake to golden:
- Slide the tray in and let the oven work its magic for about 25 minutes—watch for the top to turn golden and the edges to pull away, crackling softly.
- Cool and serve:
- Allow the focaccia to cool just long enough to avoid burning your fingerprints off, then slice thick wedges to serve warm or at room temperature.
 Pin
Pin 
I’ll never forget bringing this focaccia to my neighbor’s impromptu backyard brunch. Every time someone tore into the crust, laughter echoed and toddlers wobbled by with herby crumbs on their cheeks—it felt like what weekends were made for.
Creative Ways to Enjoy Leftovers
The day after baking, any slices that survived breakfast became my mid-afternoon snack. I love splitting them for sandwiches with roasted veggies or toasting pieces in a pan until the edges go ultra-crispy and dunking them in soup. Focaccia honestly never gets boring—it’s a blank canvas for so many easy meals.
Choosing and Using Your Herbs
I’ve discovered that mixing soft, sweet herbs like basil with punchier ones like rosemary gives the bread a layered, fresh flavor. When I’m short on supplies, I’ve raided garden beds, fridge drawers, and even pinched a few leaves from houseplants. Don’t worry if you can’t find all four—any fresh herb, especially in spring, feels special here.
Getting That Perfect Pillowy Texture
One time, cool weather made the dough stubbornly slow to rise, so I set the bowl atop the barely warm oven and watched it spring back to life. Good things really do take their time, and the dough will reward patience with open, plush holes. The smell in your kitchen is worth the wait.
- If the dough seems too sticky, wet your hands slightly before shaping.
- Let herbs and tomatoes dry a bit after washing so they don’t weigh down the dough.
- Always let the focaccia cool at least 10 minutes before slicing for the dreamiest slices.
 Pin
Pin May each batch bring a little more color and joy to your table—fresh bread really does invite company. There’s magic in sharing something so simple, warm, and brimming with whatever’s growing nearby.
Recipe Questions & Answers
- → How wet should the dough be?
The dough should be slightly sticky and tacky rather than dry. Use a wooden spoon or scraper to mix until it holds together, then oil your hands when shaping to prevent sticking.
- → Can I shorten the rising time?
Warm environments speed up fermentation; a warm oven (turned off) or a sunny spot can reduce rising to the lower end of the range. Avoid rushing—full rise gives the open crumb and light texture.
- → How do I prevent soggy tomatoes on top?
Halve cherry tomatoes and gently press them into the dough so juices mingle with the surface instead of pooling. Pat larger tomatoes dry and scatter them sparingly; a brief high oven temperature helps evaporate excess moisture.
- → Any good herb substitutions?
Swap or add fresh dill, parsley, tarragon, or oregano depending on taste. Combine robust herbs like rosemary with delicate basil or chives for layered flavor.
- → Best way to reheat leftovers?
Warm slices in a 180°C (350°F) oven for 5–8 minutes to refresh the crust, or toast individual slices until edges crisp. Avoid microwaving to maintain texture.
- → Can I add cheese for extra flavor?
Yes—fold grated Parmesan into the dough or sprinkle on top before baking for a nutty, savory finish. Add sparingly to prevent a greasy surface.