 Pin
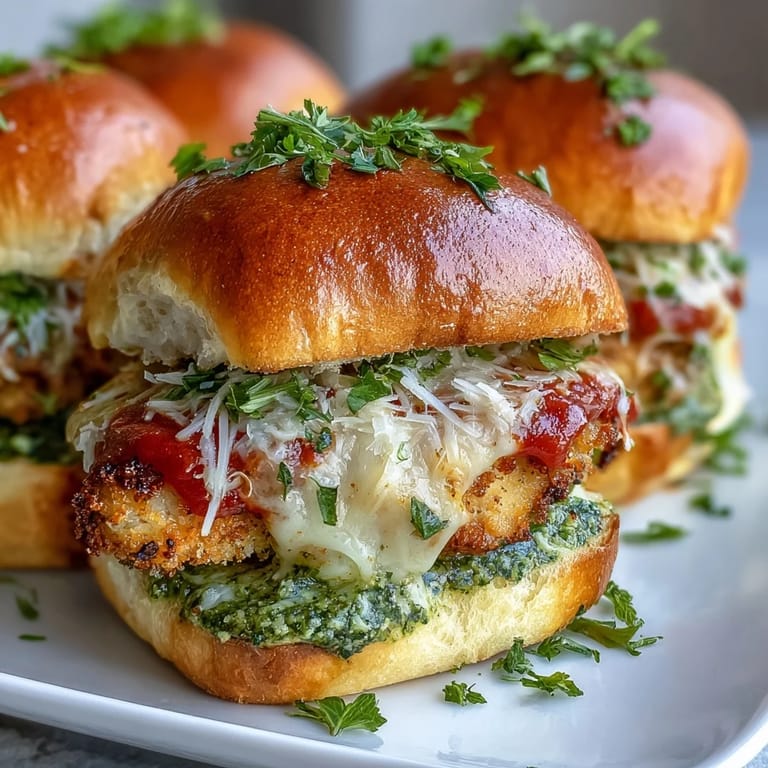
Pin My neighbor showed up at my door one afternoon with a tray of these sliders still warm from her oven, and I couldn't stop eating them. The combination of crispy pesto-crusted chicken, tangy marinara, and melted cheese all squeezed into a soft brioche bun felt like the smartest thing anyone had ever made for a gathering. I asked for her recipe that same evening, and what struck me most wasn't the ingredients—it was how she'd figured out you could make them almost entirely ahead and just finish them in the oven. Now whenever I need something that looks fancy but doesn't demand hours in the kitchen, these are my answer.
I made these for my daughter's graduation open house last spring, and watching thirty people hover around the slider platter while barely touching anything else was honestly the best compliment I could get. She kept saying people were asking what was in them because they tasted restaurant-quality, and I loved that the secret was just taking five extra minutes to bread the chicken properly and let the cheese do its thing. That day, these sliders went from being something I'd thrown together to something I felt proud to serve.
What's for Dinner Tonight? 🤔
Stop stressing. Get 10 fast recipes that actually work on busy nights.
Free. No spam. Just easy meals.
Ingredients
- Boneless, skinless chicken breasts: Cut them into twelve roughly equal pieces—you want them thin enough to cook through in fifteen minutes but thick enough that they don't dry out in the oven.
- Olive oil: Coats the chicken before breading and helps everything stick together, creating a base for flavor.
- Garlic powder, salt, and black pepper: Season the chicken directly so it has taste all the way through, not just on the outside.
- Panko breadcrumbs: Stays crispier longer than regular breadcrumbs and gives you that satisfying crunch that contrasts with the soft bun.
- Grated Parmesan cheese: Added to the breading mixture, it browns beautifully and adds a salty, nutty depth that elevates the whole thing.
- Dried Italian herbs: Mixed into the breadcrumb coating, these bring the Parmesan forward and make everything taste more cohesive.
- Mini brioche slider buns: Look for ones that are soft but sturdy enough to hold all the toppings without falling apart—this matters more than you'd think.
- Basil pesto: Two teaspoons per slider is enough to flavor it without overpowering the chicken or making the bun soggy.
- Marinara sauce: Choose one you actually like eating straight from a spoon, because that's what you're tasting here.
- Shredded mozzarella cheese: Fresh mozzarella will get rubbery under heat, so stick with the regular kind that melts into golden pools.
- Melted butter: Brushed on top, it helps the buns toast and golden up in that final bake.
- Fresh parsley: Purely optional, but it adds a bright color that makes them photograph well and signals freshness.
Instructions
- Set yourself up for success:
- Preheat your oven to 400°F and line a baking sheet with parchment paper so you're not scrambling while chicken is sitting there. Having everything ready before you start is half the battle with these.
- Season the chicken:
- Cut your chicken breasts into twelve pieces—aim for roughly the same size so they cook evenly. Toss them in a bowl with olive oil, garlic powder, salt, and black pepper until every piece is coated and glistening.
- Bread like you mean it:
- Mix panko, Parmesan, and Italian herbs in a shallow dish, then dredge each chicken piece until it's completely covered. Press the breadcrumbs on gently but firmly so they actually stick and create a crust instead of falling off in the oven.
- Bake the chicken:
- Spread breaded pieces on your prepared sheet and bake for fifteen to eighteen minutes until they're golden brown and cooked through—don't skip checking that internal temperature hits 165°F. This is the moment they transform from raw to crispy.
- Prepare the buns:
- While the chicken's in the oven, slice your slider buns in half and spread about two teaspoons of pesto on each bottom half. This keeps things from getting soggy and puts flavor right where you need it.
- Build your sliders:
- Once chicken comes out, place one piece on each pesto-covered bun bottom, spoon a tablespoon of marinara over it, and top with a handful of mozzarella. Work quickly here so the cheese can start melting while everything's still warm.
- Assemble and finish:
- Place bun tops on the sliders and arrange them in a baking dish. Brush the tops with melted butter so they'll turn golden in the oven.
- Final bake:
- Bake at 400°F for about five minutes until the cheese is completely melted and the buns are lightly toasted. You'll know it's ready when the cheese is bubbling slightly at the edges.
- Garnish and serve:
- Pull them out, scatter fresh parsley over the top if you're feeling fancy, and get them to the table while they're still warm and the cheese is still gooey.
 Pin
Pin 
There's something about watching someone's eyes light up when they bite into a slider and discover how much flavor is packed into something so small. That moment of realization—when they taste the pesto, the marinara, and the cheese all working together with that crispy-on-the-outside chicken—is exactly why I keep making these.
The Shortcut Everyone Needs
If you're truly pressed for time, rotisserie chicken tossed in pesto works beautifully and cuts your prep time nearly in half. I've done this when I'm hosting a last-minute gathering and nobody can tell the difference because the pesto and cheese do most of the heavy lifting. The trade-off is you lose that satisfying crunch from the panko, but the flavor is still exactly where it needs to be.
Cheese Swaps That Work
Mozzarella is the classic for a reason, but I've experimented with provolone when I wanted something sharper and fontina when I was craving richness. Provolone gives you a more pronounced flavor that stands up to the marinara, while fontina melts like a dream and adds a creamy, almost nutty note. Both work perfectly in the same amount, so feel free to choose based on what you have in your fridge or what mood you're in.
Making Them Ahead
These sliders are maybe my favorite make-ahead appetizer because you can prep them completely and just pop them in the oven when people arrive. Bread the chicken in the morning, assemble the sliders in the afternoon, cover them loosely with foil, and refrigerate—they'll hold for about eight hours without the buns getting weird. Then brush with butter and bake them fresh, and you've got hot, melty sliders without the last-minute scramble.
- Don't brush the buns with butter until right before baking or they'll get soggy sitting in the fridge.
- If frozen assembled sliders work for you, add two to three minutes to the final bake time.
- Serve with extra marinara for dipping because nobody says no to that.
 Pin
Pin These sliders have become my go-to for everything from casual backyard hangs to proper sit-down gatherings, which tells you everything you need to know about how reliable they are. Make them once and you'll understand why they disappeared so fast from that graduation party.
Recipe Questions & Answers
- → Can I make these sliders ahead of time?
Assemble the sliders up to step 7, then refrigerate covered for up to 4 hours before the final baking. Add an extra 2-3 minutes to the final bake time since they'll be cold.
- → What's the best way to reheat leftovers?
Wrap individual sliders in foil and warm at 350°F for 8-10 minutes. This prevents the buns from drying out while keeping the chicken crispy and cheese melted.
- → Can I use store-bought breaded chicken?
Absolutely. Use frozen breaded chicken patties or tenders, bake according to package directions, then proceed with assembly. This cuts prep time to about 10 minutes.
- → What other cheeses work well?
Provolone adds a sharper bite, fontina creates an excellent melt, and a Italian cheese blend provides variety. Just stick to shredding your own for the smoothest results.
- → How do I prevent soggy buns?
Toast the cut sides of buns lightly before spreading pesto, and avoid over-saucing. The final bake with butter on tops helps create a protective barrier.
- → Can these be frozen?
Freeze assembled unbaked sliders for up to 3 months. Thaw overnight in refrigerator, then bake at 400°F for 12-15 minutes until heated through and cheese melts.