 Pin
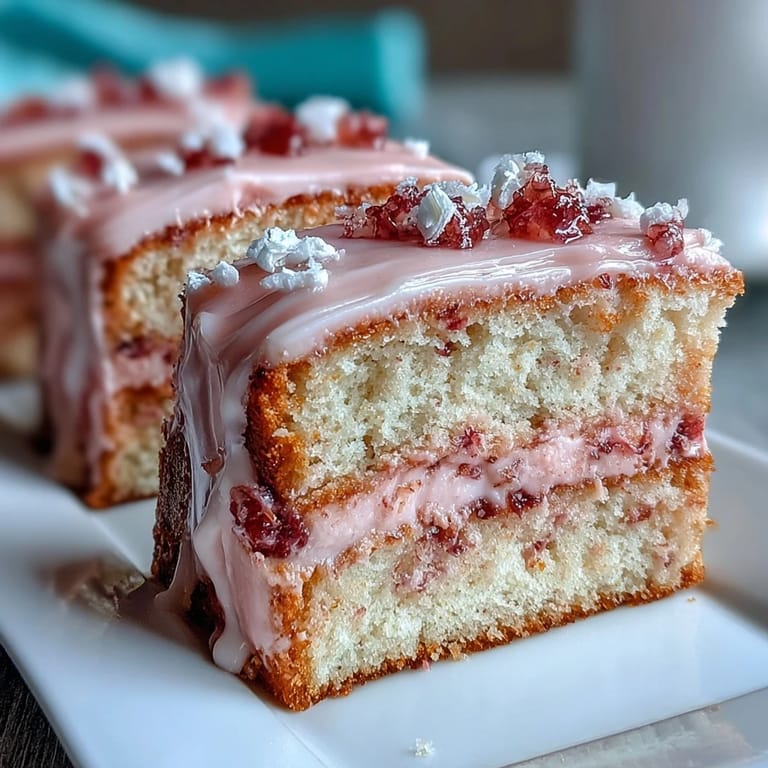
Pin I wasn't planning to bake a celebration cake that spring afternoon, but my neighbor knocked on the door with fresh flowers from her garden and suddenly the day felt different. She mentioned her daughter's engagement party was in two weeks, and without thinking much about it, I found myself sketching a cake idea on the back of an envelope—soft layers fading from yellow to pink, like a sunset nobody wanted to forget. That sketch sat on my counter for three days before I decided to stop overthinking and just make it happen.
The first time I actually served this cake was smaller than expected—just our neighborhood book club, maybe eight of us crowded around my kitchen island. One woman took a bite, closed her eyes for a second, and then looked up at the layers like she was seeing something personal in the colors. Someone else immediately started asking if I could make one for their wedding. It became this funny moment where a quiet Tuesday afternoon turned into the cake that somehow meant something.
What's for Dinner Tonight? 🤔
Stop stressing. Get 10 fast recipes that actually work on busy nights.
Free. No spam. Just easy meals.
Ingredients
- All-purpose flour (3 cups): The foundation—make sure it's fresh and measured correctly by spooning into your measuring cup, not scooping straight from the bag, which packs it too tight.
- Baking powder (2 ½ teaspoons): This is what makes the cake rise gently and keeps it tender; don't skip it or substitute with baking soda.
- Salt (½ teaspoon): Balances the sweetness and brightens the vanilla flavor in ways people don't expect.
- Unsalted butter and sugar (1 cup and 2 cups): Both must be room temperature so they cream together smoothly into that cloud-like mixture that's the secret to a moist cake.
- Eggs (4 large, room temperature): Cold eggs won't blend properly with the butter mixture, so take them out about 30 minutes ahead.
- Pure vanilla extract (1 tablespoon): The real thing matters here; the imitation version won't give you that subtle depth in the final cake.
- Whole milk (1 cup, room temperature): The temperature consistency keeps everything emulsifying smoothly without seizing up.
- Gel food coloring (pink and yellow): Gel holds the color better than liquid and won't thin out your batter the way water-based colors do.
- Unsalted butter and powdered sugar for frosting (1 ½ cups and 5 cups): The buttercream needs that balance of structure and sweetness to hold its shape while you blend those beautiful gradient colors.
Instructions
- Get Your Kitchen Ready:
- Preheat your oven to 350°F and prepare three 8-inch round pans by greasing them thoroughly and lining the bottoms with parchment paper. This step feels small but it's the difference between your cake sliding out cleanly and sticking to the pan.
- Build the Dry Base:
- Whisk together your flour, baking powder, and salt in a medium bowl, breaking up any little clumps you see in the flour. Set it aside and forget about it for a moment.
- Cream the Butter and Sugar:
- In your largest bowl, beat the room-temperature butter and sugar together on medium speed for three to four minutes until it looks pale, fluffy, and almost mousse-like. This is where the cake's tender crumb begins to form.
- Add the Eggs Slowly:
- Break each egg into a small cup first, then add them one at a time, beating well after each one goes in. This patience prevents the mixture from looking curdled or broken.
- Mix in the Vanilla:
- Stir in your vanilla extract and let it disappear into the batter.
- Alternate the Wet and Dry:
- Starting with some of the flour mixture and ending with flour, alternate adding the flour mixture and milk to your butter mixture, beating just until combined between each addition. Overmixing here toughens the cake, so stop as soon as you don't see streaks of flour.
- Divide and Color Your Batters:
- Scoop the batter evenly into three bowls. Tint one bowl with just a tiny bit of pink gel food coloring for a pale, whisper-soft pink, the second with a touch of yellow for pale yellow, and leave the third plain or add a drop of both colors if you want a peach middle layer.
- Pour Into Pans:
- Divide each colored batter into its prepared pan, smooth the tops gently, and slide them into the oven. The batter will look thin in the pans, but it rises.
- Bake and Cool:
- Bake for 22 to 26 minutes until a toothpick inserted in the center comes out clean or with just a crumb or two. Let the cakes cool in their pans for 10 minutes—this prevents them from being too fragile—then turn them out onto wire racks to cool completely.
- Make the Buttercream:
- Beat room-temperature butter on medium-high speed until it's creamy and pale, about a minute. Gradually add your sifted powdered sugar, vanilla, salt, and 3 tablespoons of milk or heavy cream, beating until the frosting is fluffy and spreadable; add more milk a teaspoon at a time if it seems too stiff.
- Tint the Frosting:
- Divide the buttercream into three bowls and tint one pastel pink, one pastel yellow, and leave one plain or very lightly tinted. The colors should be soft and spring-like, not candy-bright.
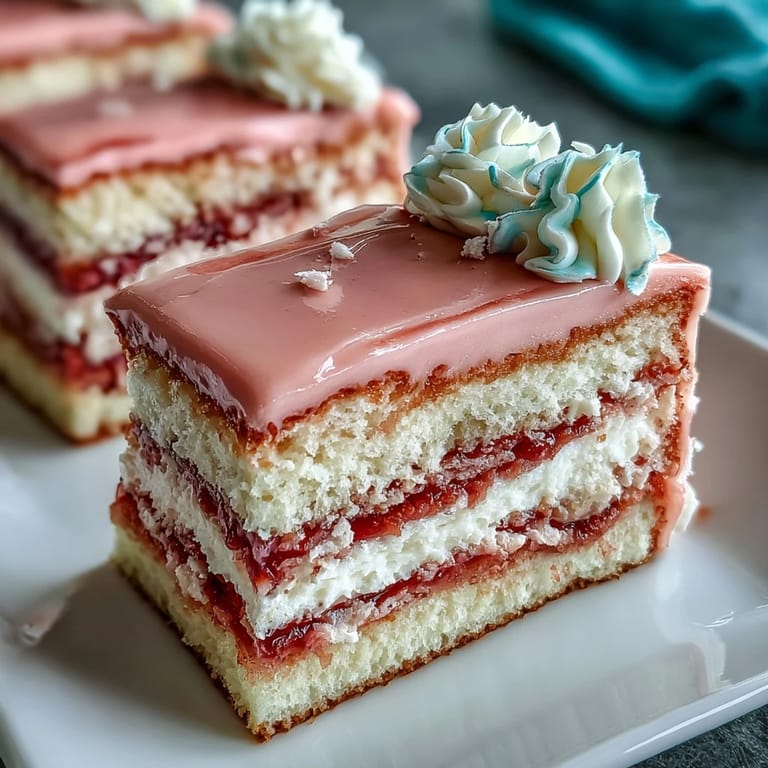
- Stack the Layers:
- Level your cake layers if they've domed on top by slicing off the rounded part with a serrated knife. Place the yellow cake on your serving plate or cake board, spread it with yellow buttercream, top with the plain or peach layer, frost with plain buttercream, then crown it with the pink layer and frost the top with pink buttercream.
- Create the Ombre Effect:
- Use your remaining frosting to frost the sides, starting with yellow at the bottom and blending upward through the plain to pink at the top. An offset spatula or bench scraper smooths the sides gently, letting the colors blend where they meet.
- Final Touches and Chill:
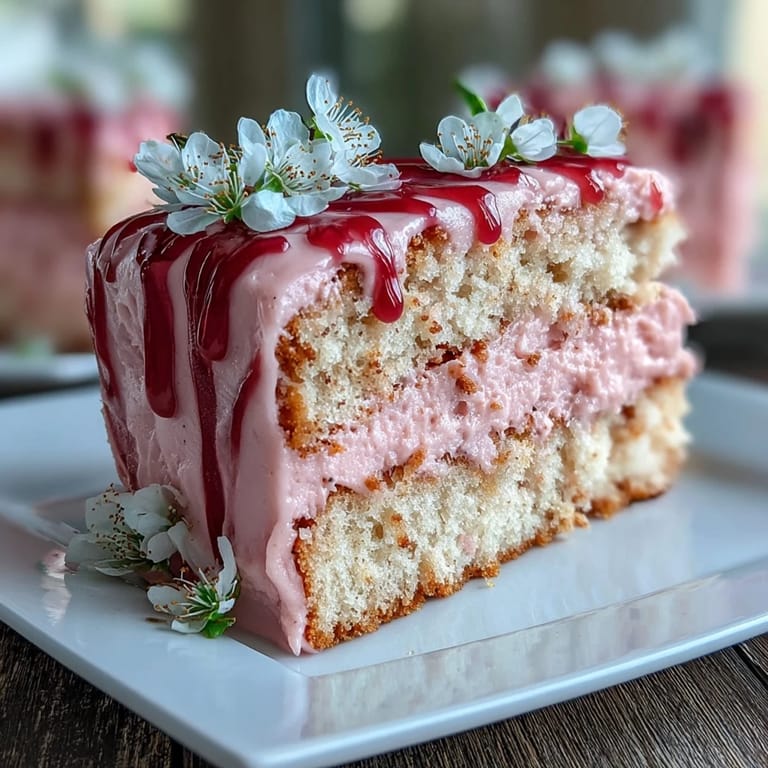
- Decorate with pastel sprinkles, edible flowers, or whatever makes your heart happy, then refrigerate the cake for at least 30 minutes before slicing so the layers stay clean and don't smush.
 Pin
Pin 
That engagement party cake became a memory not just because it looked pretty sitting on their dessert table, but because my neighbor's daughter pulled me aside and told me that her mother had cried happy tears when she saw it. Apparently, the soft yellow and pink reminded her of the sunset on her parents' porch where she'd sat with her fiancé the night he proposed. A cake became a story.
Mastering the Ombre Blend
The ombre frosting looks intimidating until you realize you're just letting colors sit next to each other and letting your spatula do the soft blending work. Start with a thin layer of yellow frosting around the bottom third of the cake, then apply plain frosting in the middle third, then pink on the top third, and let your offset spatula move gently through the seams where the colors meet. The blending happens naturally as you smooth, and any imperfection just looks intentional and organic. I learned this the hard way by trying to blend too much and muddy the colors, then learned that less is more.
Why Room Temperature Matters
The first cake I made without letting the eggs and milk sit out ended up dense and somehow gummy, which felt like a betrayal because I'd followed every other step perfectly. A baker friend explained that cold ingredients don't emulsify smoothly, so the batter breaks and traps air bubbles in all the wrong ways. Now I pull everything out 30 minutes before I start, and the difference is remarkable—the cake rises evenly, stays tender, and keeps for days without drying out.
Storing and Serving
This cake sits beautifully at room temperature for a full day if your kitchen isn't too warm, or in the refrigerator for up to four days covered loosely with plastic wrap or under a cake dome. The buttercream actually firms up when chilled, making the slices cleaner and more beautiful on the plate. Some people let it come back to room temperature for 20 minutes before serving so the frosting is softer and more pleasant to eat, while others prefer it cold and structured.
- Slice with a sharp, thin-bladed knife dipped in hot water and wiped clean between each cut for that pristine look.
- If you're transporting it, keep the cake in a closed box in a cool car rather than trying to balance it on a seat.
- Leftovers actually taste better the second day once the flavors have had time to settle and meld.
 Pin
Pin This cake never feels like a burden to make—it feels like you're creating something people will remember in their bones. Slice it on a spring afternoon with good people around, and watch it become more than just dessert.
Recipe Questions & Answers
- → How is the ombre effect achieved?
By dividing batter into three portions and tinting each with varying amounts of pink and yellow gel food coloring, then layering and frosting to blend colors smoothly.
- → Can I substitute the milk in the batter?
Yes, buttermilk can replace whole milk for a tangier taste and tender crumb without impacting the ombre colors.
- → What is the best way to level cake layers?
Use a serrated knife or cake leveler to trim domed tops evenly, ensuring stable stacking and smooth frosting application.
- → How long should the cake chill before slicing?
Chill the assembled and frosted cake for about 30 minutes to firm up the buttercream, allowing cleaner cuts.
- → Are there recommended decorations to complement the cake?
Pastel sprinkles and edible flowers enhance the soft gradient theme and add delicate visual appeal.
- → What allergens are present in this dessert?
Contains wheat, eggs, dairy (butter and milk), and potential allergens from food colorings used.