 Pin
Pin The moment I decided to tackle a Betty Boop cake, my kitchen counter looked like an art supply store had exploded. Black fondant dust settled on everything, including my cat, who watched with judgment as I attempted to sculpt cartoon hair for the third time. My daughter had begged for this showstopper for her twelfth birthday, and I was determined that those famous eyes would actually look like eyes instead of, well, something concerning.
When my daughter walked into the kitchen and saw the finished cake standing tall on its board, she actually jumped up and down. That moment of watching her friends crowd around it at the party, phones out, Instagramming before even cutting into it, made every minute of fondant frustration worth it. The best part was hearing someone whisper, Did you actually MAKE that?
What's for Dinner Tonight? 🤔
Stop stressing. Get 10 fast recipes that actually work on busy nights.
Free. No spam. Just easy meals.
Ingredients
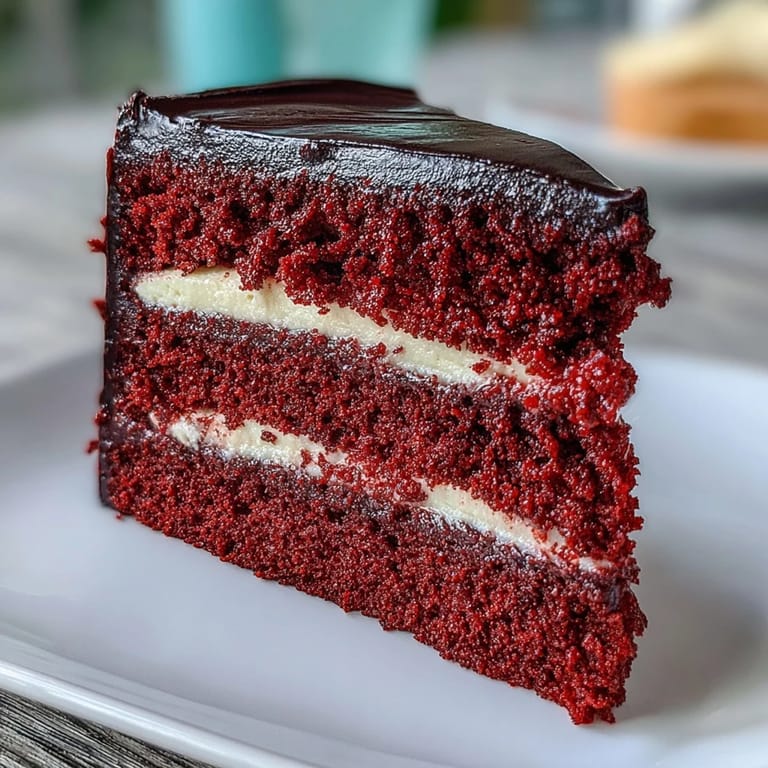
- All-purpose flour: The backbone of that tender red velvet crumb we all love
- Granulated sugar: Sweetens while helping create that fluffy texture we're after
- Baking powder: Gives the red layers their lift so they dont turn out dense
- Salt: A pinch balances sweetness and brings out the vanilla
- Unsalted butter: Room temperature is nonnegotiable for proper creaming
- Large eggs: Also at room temperature so they emulsify beautifully into the batter
- Whole milk: Adds moisture and richness to keep the cake tender
- Vanilla extract: Pure extract makes a noticeable difference in flavor depth
- Red gel food coloring: Gel delivers that intense red without thinning your batter
- Cream cheese: Must be fully softened for silky smooth buttercream
- Powdered sugar: Sifting first prevents those dreaded lumps in your frosting
- Black fondant: Ready made saves hours of trying to achieve true black
- White fondant: For those unmistakable Betty Boop eyes
- Red fondant: Those iconic lips need to pop
- Edible pearl dust: Adds subtle shimmer that makes decorations look professional
- Cornstarch: Keeps fondant from sticking to your work surface
Instructions
- Preheat your oven:
- 350°F (175°C) is the sweet spot. Grease those pans and line with parchment because red cake sticks like nobody's business.
- Whisk the dry ingredients:
- Flour, baking powder, and salt in one bowl. Set it aside and resist the urge to dump it all in at once later.
- Cream butter and sugar:
- Beat on medium for a full 3 minutes. This is where the magic happens, so dont rush it.
- Add eggs one at a time:
- Beat well after each addition. Stir in your vanilla and watch everything come together.
- Combine wet and dry:
- Alternate between flour mixture and milk, starting and ending with flour. Keep that mixer on low unless you want flour snow.
- Add the red gel:
- Mix until uniformly deep red. Remember, gel coloring is concentrated, so start small.
- Bake the layers:
- Divide evenly and smooth those tops. 25 to 30 minutes, rotating halfway through.
- Cool completely:
- Let them rest 10 minutes in pans, then invert onto wire racks. Patience here prevents tears later.
- Make the buttercream:
- Beat cream cheese and butter until smooth. Gradually add powdered sugar, then whip until fluffy.
- Assemble the cake:
- Trim domes level. Stack with buttercream between layers. Crumb coat everything and chill for 20 minutes.
- Apply final coat:
- S smooth that buttercream like your life depends on it. Imperfections show through fondant.
- Roll black fondant:
- Dust surface with cornstarch. Roll to 1/8 inch and cut Betty's hair silhouette using a template.
- Create facial features:
- Roll white fondant for eyes and highlights. Cut red lips. Dust with pearl dust if you're feeling fancy.
- Decorate the cake:
- Drape hair over the front. Attach eyes and lips with buttercream. Add lashes and eyebrows.
- Add finishing touches:
- Roll red fondant headband and place across the hair. Add any final decorations.
- Rest before serving:
- Let everything settle for 30 minutes at room temperature. Then slice and watch faces light up.
 Pin
Pin 
After the party, my daughter kept a piece of fondant from the cake in her jewelry box like it was some sort of treasure. Now whenever she sees red velvet cake anywhere, she gets this knowing smile and asks if I could recreate the magic. Some requests are worth saying yes to.
Working With Fondant
Fondant can be intimidating, but I've learned that it's surprisingly forgiving once you understand its personality. Keep your hands dusted with cornstarch, work quickly before it dries out, and never be afraid to ball it up and start over. The hair silhouette took me three attempts, and nobody ever needs to know.
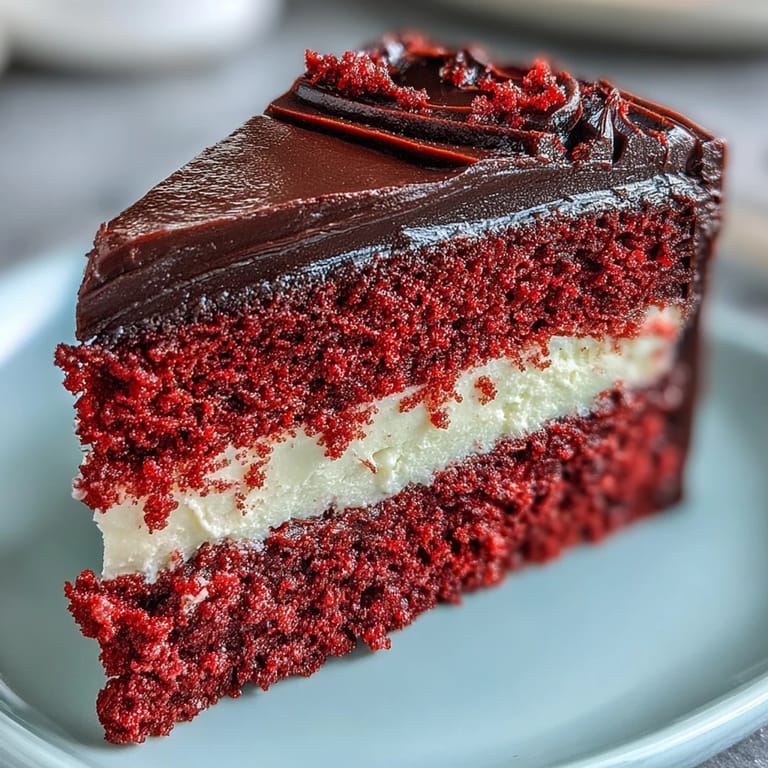
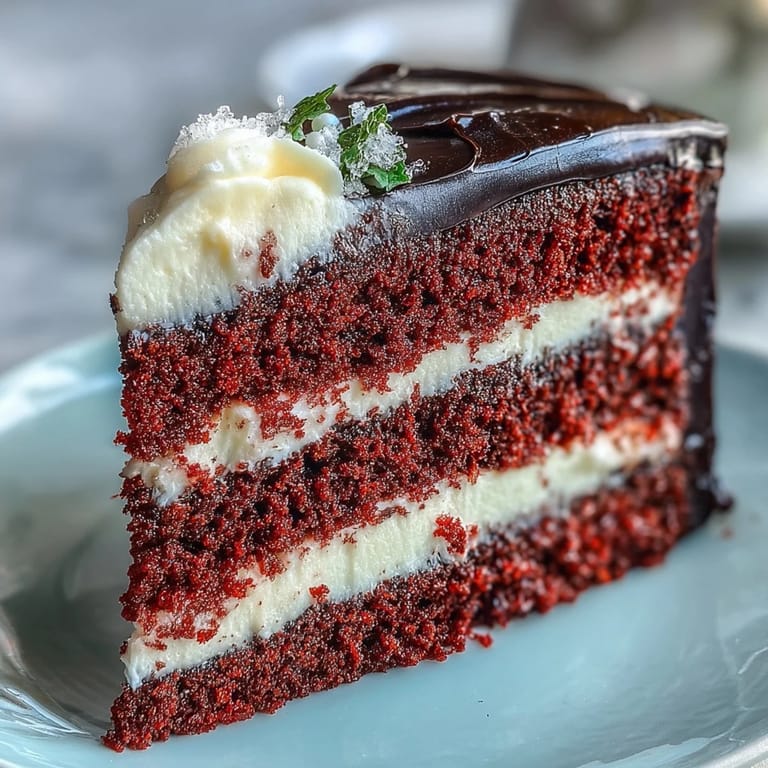
Perfect Red Velvet Every Time
The secret to truly tender red velvet is not overbaking. Pull those cakes out the moment a toothpick comes out clean, even if they seem slightly underdone. They'll continue cooking as they cool, and you'll thank yourself when everyone comments on how moist it is.
Make Ahead Strategy
You can bake cake layers up to two days ahead, wrap them tightly in plastic, and store at room temperature. Buttercream keeps in the refrigerator for a week. Fondant decorations can be made weeks in advance if stored in an airtight container away from light.
- Bring all components to room temperature before assembling
- Have a clean, flat workspace ready for fondant work
- Keep a small bowl of water nearby for sealing fondant edges
 Pin
Pin This cake is a project, but the moment you see it finished and realize you created something that looks like it came from a bakery, you will understand why some cakes are worth the effort.
Recipe Questions & Answers
- → How do I ensure the cake layers have a truly deep red color?
For a vibrant red, use a high-quality red gel food coloring rather than liquid, as liquid food coloring can thin the batter. Add it gradually until you achieve your desired intense shade, mixing thoroughly to ensure even distribution.
- → Can the fondant decorations be prepared in advance?
Yes, you can prepare all your fondant cutouts, such as the hair, eyes, and lips, up to a day or two ahead. Store them in an airtight container at room temperature, away from direct sunlight or humidity, to prevent them from drying out or becoming sticky.
- → What’s the best way to get smooth, professional-looking buttercream?
To achieve smooth buttercream, ensure both your cream cheese and butter are at room temperature before beating. Sift your powdered sugar to prevent lumps. Beat on medium-high speed until light and fluffy, then use an an offset spatula and cake scraper for a polished finish.
- → How can I prevent my cake layers from sticking to the pan?
Proper pan preparation is key. Grease your cake pans thoroughly, then line the bottoms with parchment paper. You can also lightly flour the greased sides. This creates a non-stick barrier, ensuring your layers release cleanly after baking.
- → Are there any substitutes for the cream cheese buttercream?
Certainly! While cream cheese buttercream provides a tangy contrast, you could substitute it with a Swiss meringue buttercream for a lighter, silkier texture, or a standard American buttercream. Ensure your chosen frosting is stable enough for fondant decorations.
- → What tips are there for working with fondant for the character details?
When working with fondant, dust your surface lightly with cornstarch to prevent sticking. Use templates for consistent shapes and a sharp knife or fondant tools for clean cuts. Attach pieces with a tiny dab of buttercream or edible glue. Take your time for intricate details.