 Pin
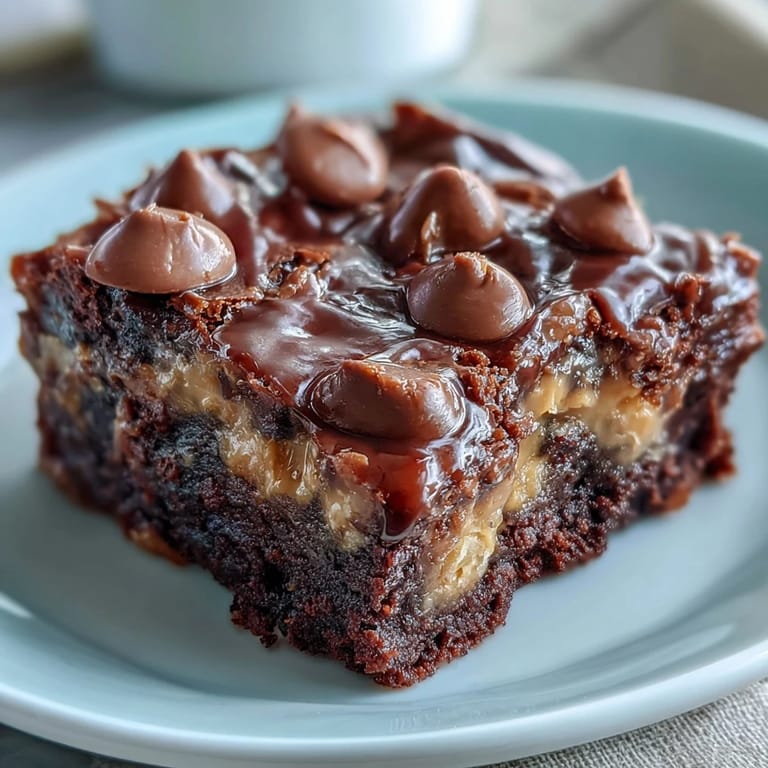
Pin The first time I made this for a potluck, my friend Sarah actually moaned when she took her first bite. That rich, warm peanut butter layer sinking into chocolate cake is the kind of dessert that makes people forget their manners. I had discovered the magic of dump cakes the hard way, after one too many complicated recipes left me exhausted before guests even arrived. This recipe restores your faith in easy baking while still delivering those serious dessert credentials.
I brought this to my sister's book club meeting last winter, and honestly, the discussion derailed immediately. Four people asked for the recipe before they even finished their first slice. Something about the combination of warm chocolate and creamy peanut butter just makes people feel taken care of, like a hug in dessert form.
What's for Dinner Tonight? 🤔
Stop stressing. Get 10 fast recipes that actually work on busy nights.
Free. No spam. Just easy meals.
Ingredients
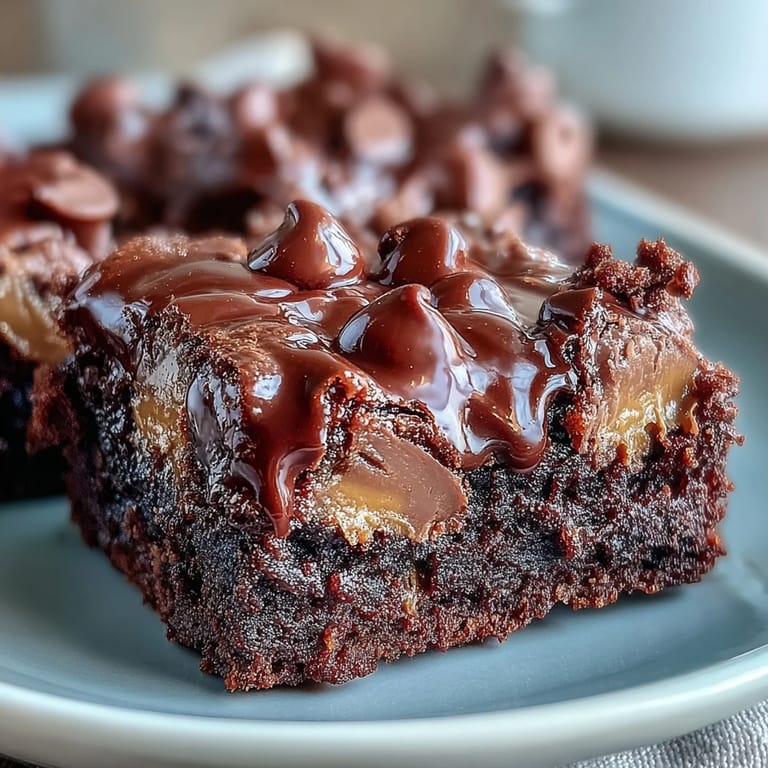
- Devils food chocolate cake mix: The deep chocolate flavor stands up beautifully to the peanut butter without needing any additional work
- Creamy peanut butter: Room temperature is crucial here so it spreads evenly instead of clumping up
- Unsalted butter, melted: Salted works too, but I prefer controlling the salt level myself
- Whole milk: Creates a tender crumb, though 2% works in a pinch
- Mini peanut butter cups: Chop full sized ones if you cannot find minis, but the small ones distribute better
- Semi sweet chocolate chips: These provide little bursts of intense chocolate throughout
Instructions
- Get your oven ready:
- Preheat to 350°F (175°C) and grease a 9x13-inch baking dish thoroughly
- Create the peanut butter layer:
- Spread the room temperature peanut butter in an even layer across the bottom of your prepared dish
- Make the batter:
- Whisk together the cake mix, melted butter, and milk until mostly smooth, though small lumps are perfectly fine
- Layer it up:
- Pour the chocolate batter evenly over the peanut butter layer
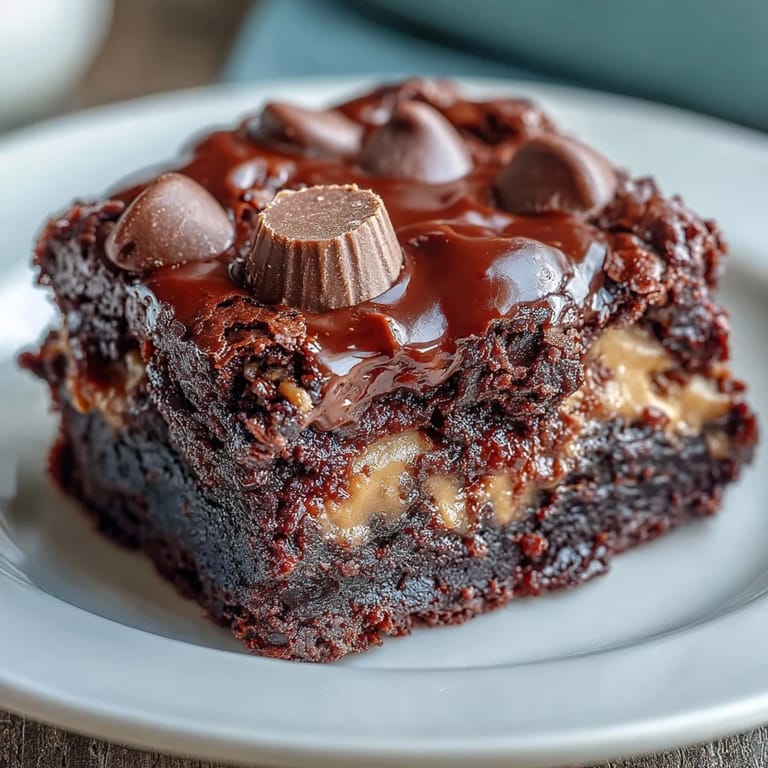
- Add the good stuff:
- Scatter those mini peanut butter cups and chocolate chips across the top
- Bake until perfection:
- Bake for 35 to 40 minutes until set, with a toothpick coming out with just moist crumbs
- The hardest part:
- Let it cool for at least 15 minutes before serving, though completely cooled cuts cleaner
 Pin
Pin 
My neighbor texts me every time she smells this baking through our shared wall. It became her daughters birthday cake request three years running now. Some recipes are just food, but this one somehow becomes part of peoples stories.
Make It Your Own
After making this dozens of times, I have learned that simple tweaks keep it exciting. Try sprinkling chopped roasted peanuts over the top for that extra crunch factor that contrasts beautifully with the soft cake. The texture upgrade makes it feel more like a restaurant dessert.
Serving Suggestions
Warm with vanilla ice cream is the classic move for good reason. That cold cream melting into the warm, peanut buttery cake creates the most perfect temperature contrast. I have also served it with a drizzle of warm salted caramel when I really want to impress.
Storage And Timing
This actually keeps surprisingly well, though good luck having leftovers. Room temperature for up to two days works perfectly, or refrigerate for up to five days if your kitchen runs warm. A quick 20 second zap in the microwave brings back that just baked magic.
- Bake this the morning of your event for optimal texture
- The flavors actually develop more depth after sitting overnight
- Never skip the cooling time or you will end up with a mess on your plate
 Pin
Pin Every time I serve this, someone tells me it is the best thing they have ever eaten. That kind of reaction is what keeps us coming back to the kitchen, isnt it?
Recipe Questions & Answers
- → What makes this a dump cake?
It earns the name because you literally dump ingredients into the baking dish without complex mixing. Simply spread peanut butter, pour the batter over it, and scatter toppings—no electric mixer or advanced techniques required.
- → Can I use natural peanut butter?
Stick with creamy conventional peanut butter for best results. Natural varieties tend to separate and may create a greasy layer. The stabilized texture of regular peanut butter melts beautifully into the cake base.
- → Should this be served warm or cold?
Both work beautifully. Warm serving emphasizes the gooey, melty qualities of the peanut butter cups and creates that comforting dessert experience. Chilled portions offer a denser, fudge-like texture and cut cleaner for neat presentation.
- → Can I prepare this ahead of time?
Assemble everything up to 24 hours in advance, cover tightly, and refrigerate until ready to bake. You may need to add a few extra minutes to the baking time if going straight from the refrigerator. Leftovers keep well for several days.
- → What size baking dish works best?
A standard 9x13-inch baking dish provides the ideal depth and surface area. The cake layer rises appropriately without overflowing, while the peanut butter creates a distinct bottom layer. Glass or metal both work equally well.
- → Can I make this gluten-free?
Use a gluten-free devil's food cake mix and ensure your peanut butter and chocolate chips are certified gluten-free. The resulting texture remains excellent, though check labels carefully on the mini peanut butter cups as well.