 Pin
Pin I discovered this dessert by accident on a rainy afternoon when I was playing with leftover ingredients, trying to impress someone who claimed to be bored by traditional sweets. The idea came from watching them arrange tiles on a kitchen counter—a tiny, deliberate game that sparked something: why not make a dessert that felt like edible art? Each bite needed to surprise, to shift textures and flavors like moving across a board. That day, The Checkerboard Terrace was born, and it's been my secret weapon for turning skeptics into believers ever since.
I made this for a dinner party where someone brought a wine pairing guide, and we ended up debating whether Moscato d'Asti could handle chocolate and caramel in the same bite. It could—it absolutely could—and watching four people at the table taste each square in a different order, discovering their own favorite combination, felt like I'd created something genuinely fun instead of just another dessert course.
What's for Dinner Tonight? 🤔
Stop stressing. Get 10 fast recipes that actually work on busy nights.
Free. No spam. Just easy meals.
Ingredients
- Crisp shortbread cookies (80 g), crushed: These form your foundation and deliver a buttery snap; look for plain varieties so they don't compete with other layers, and crush them until they're fine crumbs but still have some texture.
- Unsalted butter, melted (30 g): This binds the crumbs into a cohesive base that holds up when you're spreading layers; melt it gently so it stays clear and doesn't cool too quickly.
- Cream cheese, softened (80 g): It needs to be truly soft—leave it on the counter for 20 minutes before mixing—so it beats smooth without lumps that mess with your texture contrast.
- Powdered sugar (30 g): Sifted before adding prevents grainy layers and keeps the soft square genuinely silky.
- Vanilla extract (1 tsp): This quiet note keeps the cream cheese from tasting one-dimensional.
- Dark chocolate, chopped (100 g): Use something you'd actually eat on its own; cheap chocolate ganache tastes cheap, and this is where it shows.
- Heavy cream (60 ml): Just barely simmering is the magic point—too hot and you'll break the emulsion, too cool and the chocolate won't melt through.
- Salted caramel sauce (80 g): Homemade is richer, but store-bought works beautifully if you check that it's actually salted, not sweet caramel masquerading as sophisticated.
- Flaky sea salt, for garnish: Use the good stuff—Maldon or similar—because those delicate crystals add complexity that fine table salt simply cannot.
- Fresh raspberries, optional (16 small): If you use them, choose ones that are ripe but still firm so they don't collapse during chilling.
Instructions
- Mix and press the foundation:
- Combine crushed cookies with melted butter until the mixture feels like damp sand, then press it firmly into a parchment-lined 20x20 cm baking dish in an even layer. The parchment is your escape route—it makes removing the finished dessert infinitely easier.
- Chill the base:
- Refrigerate for 15 minutes so the butter sets slightly and your base stays intact when you layer on top.
- Beat the soft layer:
- Whip softened cream cheese with powdered sugar and vanilla until absolutely smooth and airy, about 2 minutes with an electric mixer. Lumps here will announce themselves loudly when you bite down.
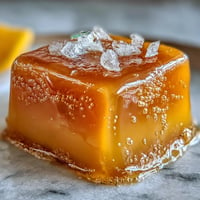
- Create the chocolate ganache:
- Heat cream just until you see steam and tiny bubbles at the edges, pour it over chopped chocolate, wait 2 minutes for the heat to do its work, then stir gently until glossy and thick. This moment feels like magic every time.
- Prepare the salty layer:
- Use your salted caramel—homemade or store-bought—and have it at room temperature so it spreads without cracking the crunchy base underneath.
- Mark your grid:
- Use a ruler and a sharp knife to lightly score the chilled base into 16 equal squares (4 by 4), pressing just hard enough to create guides without cutting all the way through the base.
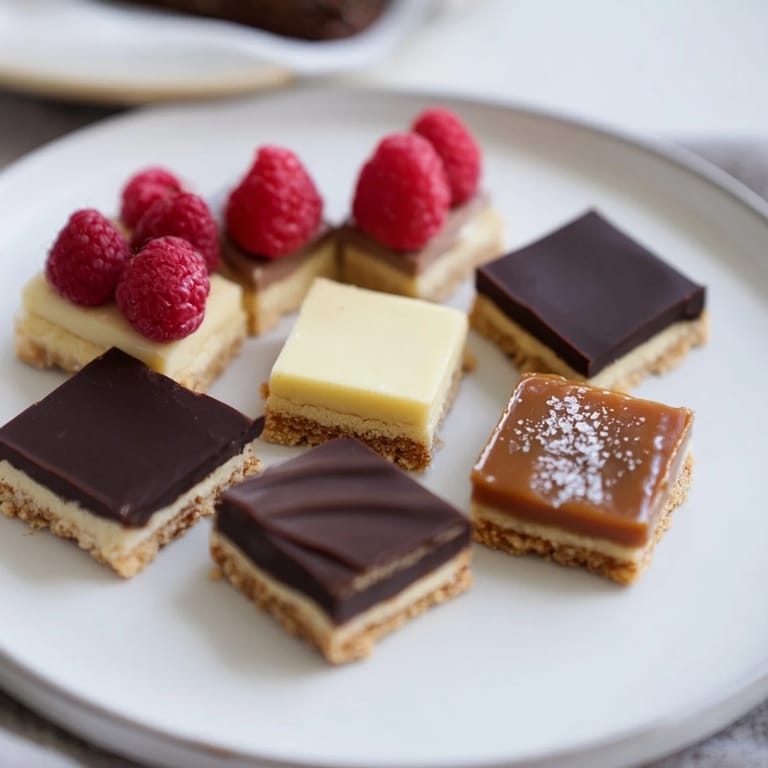
- Fill the checkerboard:
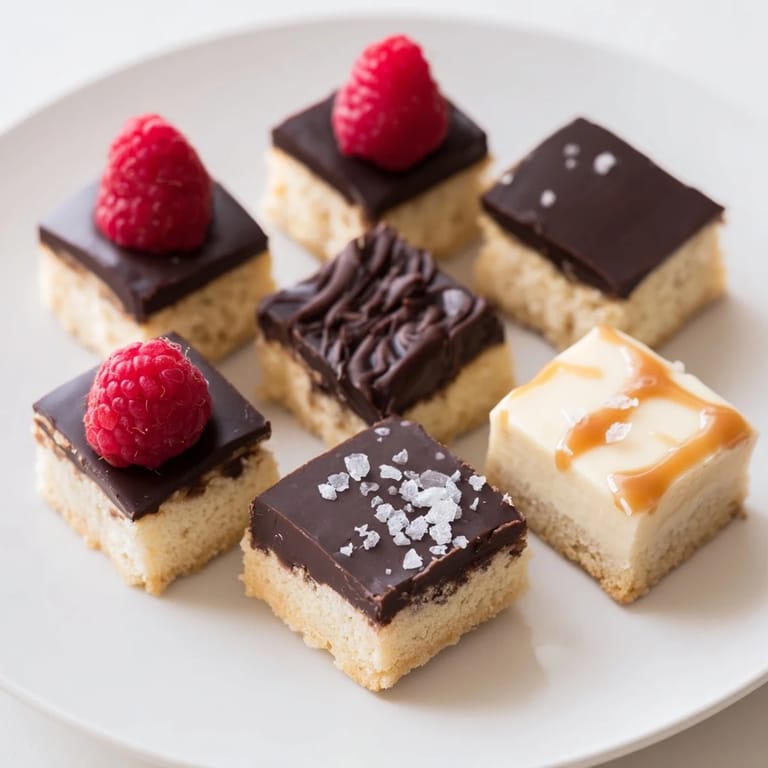
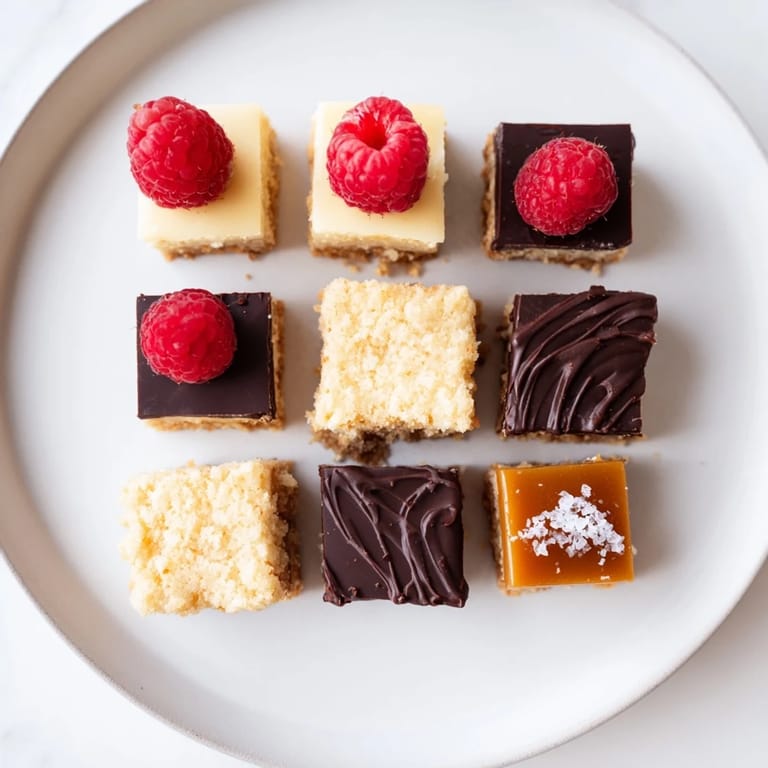
- Spread the cream cheese mixture into four squares, chocolate ganache into four others, salted caramel into four more, and leave the last four bare (topped with raspberries if you're using them). Arrange them so identical textures never touch—crunchy touches creamy touches sweet touches salty, creating the actual checkerboard pattern.
- Set everything:
- Chill the assembled dessert for 30 minutes so all the layers firm up and the flavors start getting to know each other.
- Slice and serve:
- Using a sharp, clean knife (wiped between cuts helps), slice carefully along your grid lines and serve slightly chilled so textures remain distinct and flavors pop.
 Pin
Pin 
The moment I realized this dessert had become something special was when my sister asked to take one square home in a napkin—not the whole thing, not a plate, just one square she wanted to remember. That's when I understood it wasn't really about technique or ingredients; it was about creating something small enough to feel precious and varied enough that one bite wasn't enough.
Why Texture Matters More Than You Think
Most desserts are built around one texture—cake is cake, mousse is mousse—and you get comfortable, bored even. This one refuses to let you settle. The crunch wakes you up, the cream mellows you out, the chocolate seduces, and the caramel closes the loop with salt. It's conversation in a bite, and that's why people remember it long after they've eaten it.
Timing and Temperature as Invisible Ingredients
I learned this the hard way when I once tried to speed through the process and skipped the chill times. Everything looked fine until I cut into the finished dessert and found that layers had started bleeding into each other, compromising that sharp textural contrast that makes this whole thing work. Now I'm religious about chilling—it's not wasted time, it's when the magic actually sets in. Cold components hold their boundaries, stay distinct, and deliver the full experience they're meant to deliver.
Customization and Confidence
The beauty of this format is that it invites play. I've swapped in mascarpone for that richer edge, added lemon zest for brightness, used white chocolate when I wanted something lighter, and replaced half the shortbread with crushed hazelnuts for a nutty note. Each change shifts the whole experience without breaking the structure. The checkerboard itself is flexible enough to absorb creativity while staying recognizable.
- For a autumn twist, try adding a tiny pinch of cinnamon to the cream cheese layer or swapping the dark chocolate for salted dark chocolate.
- If you're serving this at a dinner party, prepare and chill everything the morning of—you can assemble and serve it an hour before guests arrive with zero stress.
- Keep the slicing knife warm and clean between cuts (dip it in hot water and wipe it dry) so each square stays crisp and defined instead of dragging and crumbling.
 Pin
Pin This dessert has become the one I make when I want to say something without words—when texture and flavor and thoughtfulness need to speak louder than effort. It's small, it's surprising, and it always leaves people wondering how something so elegant came from such simple parts.
Recipe Questions & Answers
- → How do you create the crunchy base?
Mix crushed shortbread cookies with melted butter, press evenly into a lined dish, and chill for firmness.
- → What is the best way to prepare the chocolate layer?
Heat heavy cream to just simmering, pour over chopped dark chocolate, let sit for 2 minutes, then stir until smooth.
- → Can the soft layer be substituted for a richer texture?
Yes, mascarpone can replace cream cheese for a creamier and richer soft layer.
- → How should the layers be assembled for the checkerboard effect?
Arrange four squares for each texture in a 4x4 grid ensuring no identical textures touch adjacent squares for visual contrast.
- → What garnish complements the flavors best?
Fresh raspberries add a pop of color and subtle tartness, enhancing the overall presentation and taste.
- → Is it possible to alter the sweet layer?
Yes, white chocolate ganache can replace dark chocolate for a different sweetness profile.