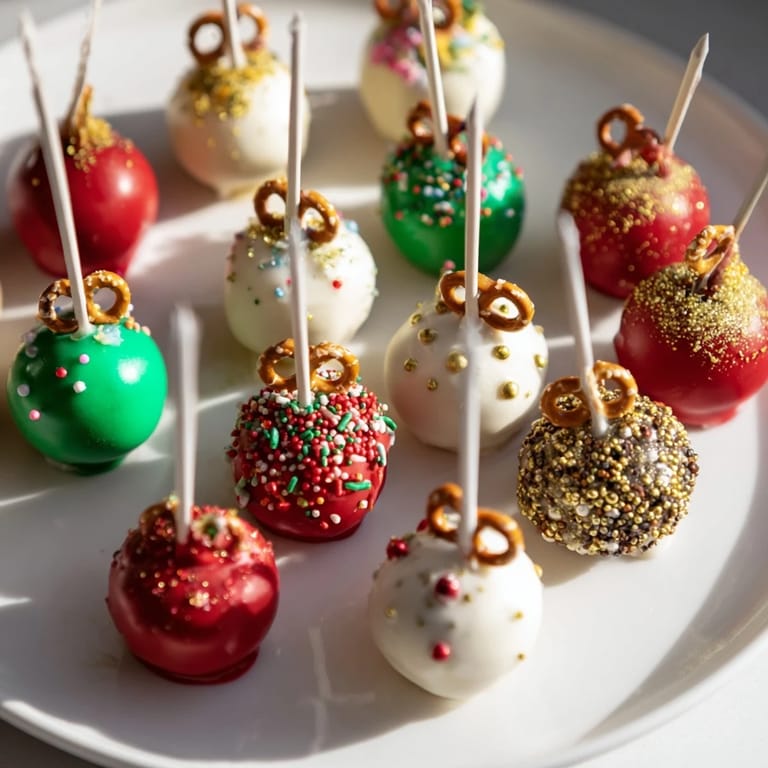
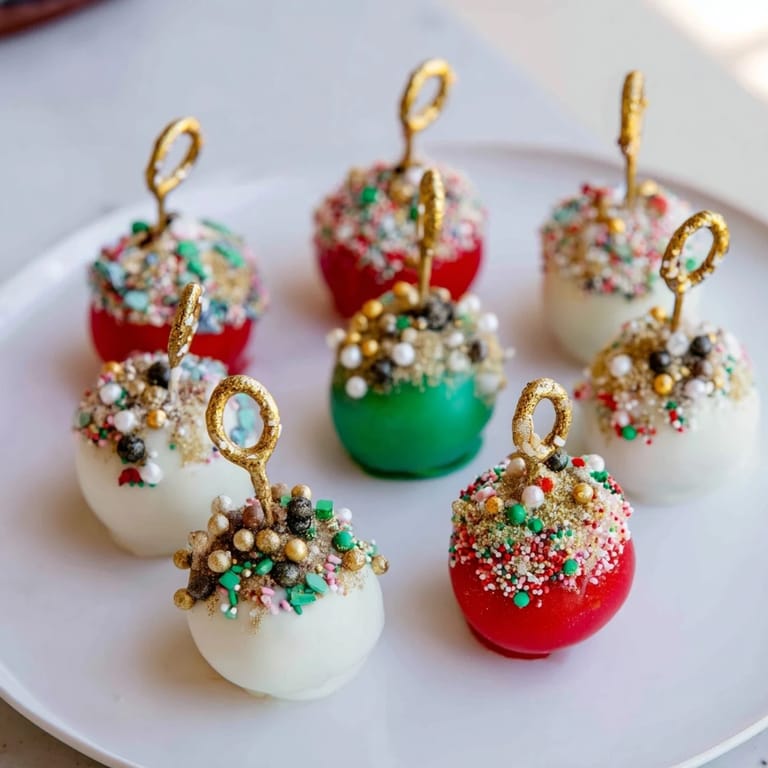
Festive ornament ball display

Featured in: Sweet Treats

These ornament balls feature moist cake crumbs blended with frosting, shaped into smooth spheres, then coated with vibrant colored melts. Decorated with sprinkles, edible glitter, and candy details, they evoke festive holiday charm. Chilling between steps ensures firm coating and clear designs. Presented upright on stands, these treats are perfect for parties.

Using a mix of white chocolate melts and decorative toppings, each ball mimics a holiday ornament’s colorful glow. Preparation includes baking, cooling, mixing, shaping, coating, and detailed decorating. This centerpiece brings a playful, edible twist to any celebration table.

Updated on Wed, 10 Dec 2025 10:56:00 GMT
Festive ornament ball cake pops with colorful sprinkles are perfect holiday desserts. Pin
Festive ornament ball cake pops with colorful sprinkles are perfect holiday desserts. | kitchenprairie.com

A festive and eye-catching dessert featuring cake pops decorated as colorful holiday ornaments, perfect for parties and celebrations.

This recipe became a favorite at our holiday gatherings and always impresses guests with its fun look and delicious taste.

Ingredients

  • Cake: 1 box (about 400 g) vanilla or chocolate cake mix (plus ingredients per package)
  • Frosting: 1/2 cup (120 g) cream cheese frosting or vanilla buttercream
  • Decoration & Coating: 500 g white chocolate or candy melts (assorted colors), 2 tbsp (25 g) vegetable shortening (optional for smoother coating), assorted sprinkles edible glitter and small candies, 24 mini pretzel loops or candy-coated chocolate pieces (for ornament tops), edible gold or silver luster dust (optional)

Instructions

Step 1:
Bake the cake according to package instructions. Allow to cool completely.
Step 2:
Crumble the cooled cake into fine crumbs in a large mixing bowl.
Step 3:
Add frosting gradually, mixing until the mixture holds together and can be shaped.
Step 4:
Scoop out tablespoon-sized portions and roll into smooth balls. Place on a parchment-lined tray.
Step 5:
Chill the cake balls in the refrigerator for at least 30 minutes.
Step 6:
Melt the chocolate or candy melts in a microwave-safe bowl, stirring until smooth. Stir in shortening if needed for a thinner consistency.
Step 7:
Dip one end of a lollipop stick into the melted coating, then insert halfway into a cake ball. Repeat for all balls and chill again for 10 minutes to set.
Step 8:
Dip each cake pop fully into the melted coating, gently tapping off excess.
Step 9:
Before the coating sets, decorate each pop with sprinkles glitter or candies to resemble ornament balls. Attach a mini pretzel loop or candy at the top for the ornament hook.
Step 10:
Stand pops upright in a foam block or cake pop stand to set fully.
Step 11:
Dust with edible luster dust for a shimmering effect if desired.
Vibrant ornament ball cake pops, coated in white chocolate and ready for a party. Pin
Vibrant ornament ball cake pops, coated in white chocolate and ready for a party. | kitchenprairie.com
Instant Pot Duo Plus 9-in-1
Instant Pot Duo Plus 9-in-1 Multicooker
🔥 Black Friday: 57% OFF — Rare Occasion!
I personally use this model all the time for my recipes — soups, stews, rice, slow-cooking… it does everything. If you've been thinking about getting one, this Black Friday deal is **honestly one of the best I’ve seen**.
👉 Get the Black Friday Deal

Our family loves gathering around the table to decorate these cake pops and share smiles during the holiday season.

Required Tools

Stand mixer or large mixing bowl, baking pan, parchment paper, microwave-safe bowls, lollipop sticks, styrofoam block or cake pop stand

Allergen Information

Contains Wheat (gluten) eggs milk soy (in candy melts) and possibly nuts (depending on decorations). Check all labels carefully if serving to those with allergies.

Nutritional Information

Calories 180 Total Fat 7 g Carbohydrates 27 g Protein 2 g per serving

Close-up of delicious ornament ball cake pops, decorated with edible glitter and pretzel "hooks." Pin
Close-up of delicious ornament ball cake pops, decorated with edible glitter and pretzel "hooks." | kitchenprairie.com

This recipe brings festive cheer and delightfully sweet moments to any celebration.

Recipe Questions & Answers

How do I get a smooth coating on the ornament balls?

Melting the candy melts gently and adding vegetable shortening helps achieve a thin, even coating that sets smoothly.

What’s the best way to keep the balls firm during decorating?

Chill the shaped balls before and after inserting sticks, allowing the coating to set firmly for easier decoration.

Can I use different cake flavors for variety?

Yes, both vanilla and chocolate cake mixes work well and can be combined or alternated for diverse flavors.

How do I create the ornament hooks on top?

Attach mini pretzel loops or candy-coated chocolates at the top before the coating sets to mimic ornament hooks.

What’s a good way to display these for parties?

Stand the finished balls upright in a Styrofoam block or dedicated stand to showcase their colors and decorations beautifully.

Festive ornament ball display

Vibrant holiday ornament balls with colorful coatings and festive decorations perfect for celebrations.

Prep duration
45 min
Cook duration
30 min
Complete duration
75 min


Skill level Medium

Heritage American

Output 24 Portions

Diet specifications Vegetarian

Components

Cake

01 1 box (14 ounces) vanilla or chocolate cake mix with required ingredients as per package

Frosting

01 ½ cup (4 ounces) cream cheese frosting or vanilla buttercream

Decoration & Coating

01 1 pound (16 ounces) white chocolate or candy melts, assorted colors
02 2 tablespoons (0.9 ounce) vegetable shortening, optional for smoother coating
03 Assorted sprinkles, edible glitter, and small candies
04 24 mini pretzel loops or candy-coated chocolate pieces for ornament tops
05 Edible gold or silver luster dust, optional

Directions

Phase 01

Bake Cake: Prepare and bake cake according to package directions. Allow to cool completely.

Phase 02

Crumble Cake: Crumble cooled cake into fine crumbs inside a large mixing bowl.

Phase 03

Mix Frosting: Gradually add frosting to cake crumbs while mixing until the mixture binds and can be shaped.

Phase 04

Form Cake Balls: Scoop tablespoon-sized portions and roll into smooth balls. Place on parchment-lined tray.

Phase 05

Chill Cake Balls: Refrigerate cake balls for at least 30 minutes to firm up.

Phase 06

Melt Coating: Melt white chocolate or candy melts in a microwave-safe bowl, stirring until smooth. Stir in shortening if needed for a thinner consistency.

Phase 07

Insert Sticks: Dip one end of each lollipop stick into melted coating, then insert halfway into each cake ball. Chill for 10 minutes to set.

Phase 08

Coat Cake Pops: Fully dip each cake pop into melted coating, gently tapping off excess.

Phase 09

Decorate: Before coating sets, decorate with sprinkles, glitter, or candies. Attach mini pretzel loop or candy at top to resemble ornament hook.

Phase 10

Set Upright: Place cake pops upright in foam block or cake pop stand to set completely.

Phase 11

Add Luster Dust: Optionally dust finished pops with edible gold or silver luster dust for shimmer.

Necessary tools

  • Stand mixer or large mixing bowl
  • Baking pan
  • Parchment paper
  • Microwave-safe bowls
  • Lollipop sticks
  • Styrofoam block or cake pop stand

Allergy details

Review each component for potential allergens and consult with healthcare professionals if you're uncertain.
  • Contains wheat (gluten), eggs, milk, soy (in candy melts), and possible nuts depending on decoration.

Nutrient content (each portion)

This data is offered as a general guide and isn't a substitute for professional medical guidance.
  • Energy: 180
  • Fat: 7 g
  • Carbohydrates: 27 g
  • Protein: 2 g