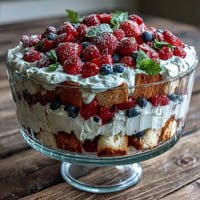
 Pin
Pin I still remember the first time I arranged a dessert board for my sister's engagement party. I'd spent hours at the farmer's market, selecting the most beautiful berries and stopping by three different patisseries to find the perfect macarons. When I finally laid everything out on my grandmother's marble board, something magical happened—it stopped being just a collection of treats and became a centerpiece that told a story of care and celebration. That's when I realized that a dessert board isn't just about the flavors; it's about creating a moment people won't forget.
My friend texted me the night before her dinner party in a mild panic: she'd planned an elaborate menu but ran out of energy for dessert. I offered to bring a board, and she thought I was crazy. But when I arrived with that marble platter, symmetrical and glistening with chocolate drizzles, her face lit up in a way that told me everything. Her guests lingered around that board for an hour, mixing and matching bites, taking photos, making memories. That's when I understood the real power of this recipe.
What's for Dinner Tonight? 🤔
Stop stressing. Get 10 fast recipes that actually work on busy nights.
Free. No spam. Just easy meals.
Ingredients
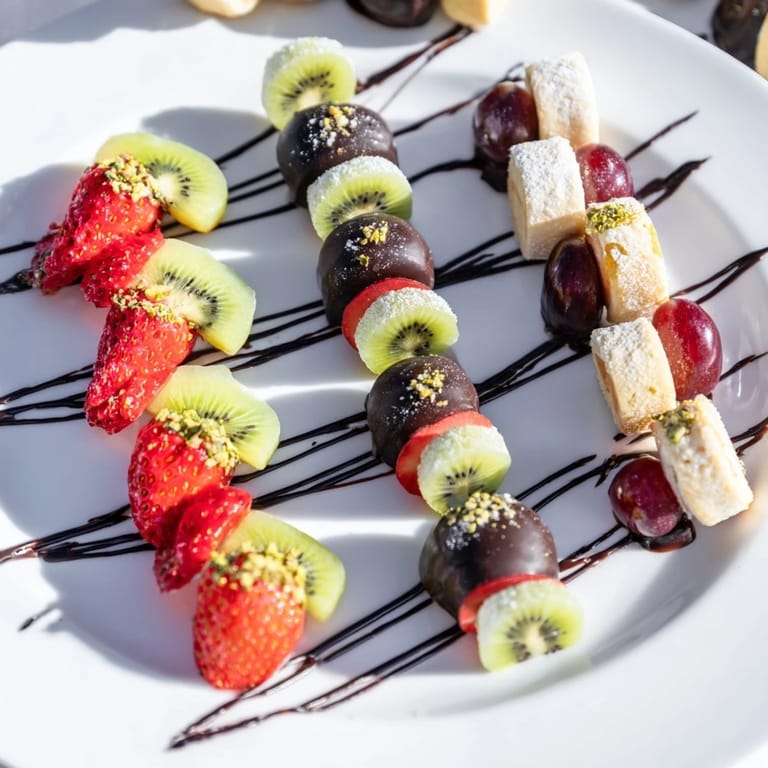
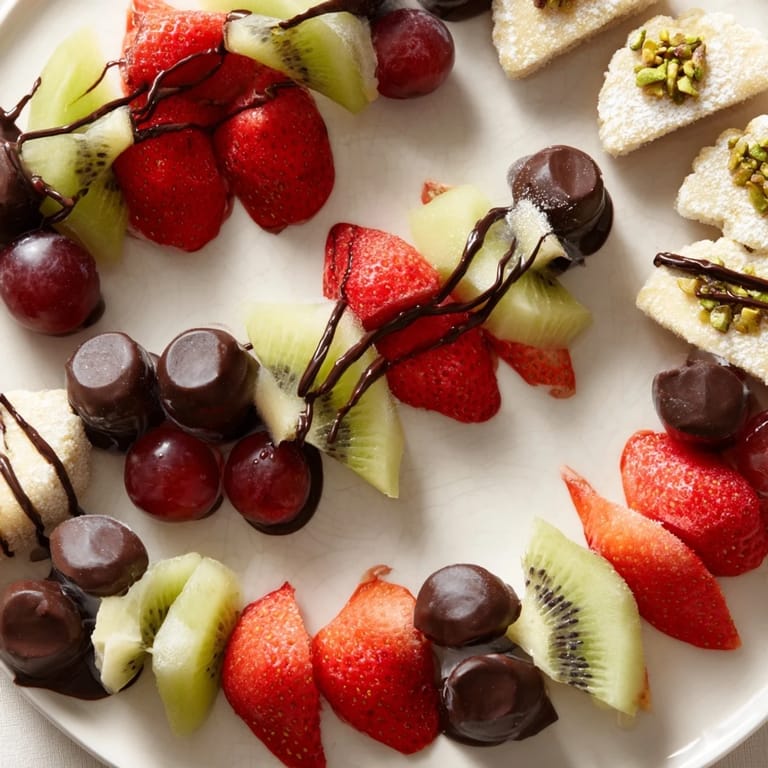
- Fresh Strawberries (1 cup, hulled and halved): These are your visual anchors—choose the deepest red ones you can find. I learned the hard way that slightly underripe berries hold their shape better than perfectly ripe ones, and they photograph beautifully.
- Seedless Red Grapes (1 cup, halved): They add jewel-like pops of color and are refreshingly crisp against the richness of chocolate and pastries. Halving them makes them elegant rather than casual.
- Kiwi (1 cup, peeled and sliced): The bright green interior creates stunning visual contrast. Slice them just before assembly so they stay vibrant and don't oxidize.
- Blueberries (1 cup): Leave these whole—they roll slightly, creating natural movement on the board and filling awkward gaps with ease.
- Blackberries (1 cup): These are delicate, so handle them gently and place them last. Their deep color makes everything else pop.
- Orange (1 large, thinly sliced): These citrus rounds become almost stained-glass-like when light hits them. The bright color ties the whole board together and adds a subtle fresh note.
- French Macarons (8 small, assorted colors and flavors): Buy these from a quality patisserie if possible—they're the jewelry of your board. Their pastel colors create sophistication immediately.
- Mini Meringues (12): These delicate, crispy-chewy bites add height and texture. They're surprisingly sturdy once set, which makes them perfect for boards.
- Dark Chocolate Truffles (10): Choose high-quality ones with smooth, unblemished surfaces. They're small but mighty in visual impact and flavor.
- Mini Eclairs (8): Buy these fresh on the day of assembly if possible. They're indulgent little treasures that guests absolutely crave.
- Assorted Bite-Size Shortbread Cookies (1 cup): Shortbread's pale color provides neutral space for the eye to rest among all the vibrant fruits and sweets.
- High-Quality Dark Chocolate (1 cup, chopped): Don't skimp here—the chocolate drizzle is a signature element. Good chocolate melts smoothly and sets with a subtle sheen.
- Coconut Oil (2 teaspoons, refined): This keeps the melted chocolate fluid without adding flavor. I discovered this after too many batches of chocolate that seized into grainy clumps.
- Chopped Pistachios (¼ cup): Their pale green color is stunning against dark chocolate. Toast them lightly if you want to deepen their flavor—it makes a real difference.
- Edible Flowers (¼ cup, violas or pansies, optional): These are the final flourish that transforms a nice board into a show-stopper. Fresh edible flowers from a grocery store or farmers market are safest.
- Confectioners' Sugar (1 tablespoon): A light dusting creates a delicate, professional finish that catches light beautifully.
Instructions
- Start With Your Canvas:
- Choose your serving board—marble, wood, or slate all work beautifully, each bringing its own elegance. A large board (at least 18 inches across) gives you room to breathe and creates impact. Wipe it down with a damp cloth and dry it completely. This step matters more than you'd think; a clean, dry surface prevents fruit from sliding and shows off the colors without distraction.
- Refresh Your Fruit:
- Rinse all your fruit under cold water and pat each piece completely dry with paper towels—this is crucial. Moisture is your enemy here; it makes berries weep and the board look careless rather than curated. As you dry each piece, mentally note which strawberries are the most perfect red, which grapes have the most interesting shine. This mindful prep is half the pleasure.
- Slice With Intention:
- Hull and halve your strawberries, halve the grapes, slice kiwis into thin rounds that let light shine through, and cut orange into thin, even slices. As you work, you're not just prepping—you're starting to envision how these pieces will nestle together. Select similarly sized pieces for each variety; this consistency creates the symmetry that makes the board feel intentional rather than random.
- Arrange Your Fruit Borders:
- This is where the magic begins. Start by arranging fruit in neat lines along the board's edges, alternating colors—perhaps strawberries, then grapes, then kiwi, then blackberries. Create mirrored curves or symmetrical patterns that please your eye. The fruit should look vibrant and glistening but not wet; this is the sensory checkpoint that tells you you're on the right track. Step back frequently and adjust until it feels balanced.
- Cluster Your Pastries and Sweets:
- Unwrap your macarons, meringues, truffles, eclairs, and cookies with care—these are delicate treasures. Arrange them in symmetrical clusters, keeping like items together but alternating textures for visual interest. Place a cluster of pale macarons next to dark truffles, position crisp cookies near creamy eclairs. Handle each piece gently; a smudge or crumble changes everything. The board is starting to feel like a work of art now.
- Melt Your Chocolate Thoughtfully:
- Place your chopped dark chocolate and coconut oil in a microwave-safe bowl. Microwave in 20-second bursts, stirring gently between each burst, until fully melted and glossy—usually about 1 to 1½ minutes total. Don't rush this; overheated chocolate becomes grainy and loses its sheen. Let it cool for 2 minutes; it should be smooth and pourable but no longer steaming. This is the moment where patience pays off in elegance.
- Drizzle With Confidence:
- Transfer your melted chocolate to a small piping bag, or use the back of a spoon for a more organic drizzle. Move in symmetrical arcs or thin lines, avoiding pooling—thin lines are far more elegant than puddles. Drizzle over select fruit clusters and pastry groups, creating visual movement across the board. Don't worry about perfection; intentional drizzles feel artistic, not messy. Allow the chocolate to set at room temperature for 10 to 15 minutes; it should feel firm and matte when ready.
- Add Your Final Flourishes:
- Sprinkle chopped pistachios over the chocolate-draped areas for color and crunch. Dot the platter with edible flowers, spacing them symmetrically for maximum visual appeal. Lightly dust some cookies and fruit with confectioners' sugar using a fine sieve—this creates that professional, delicate finish that makes people gasp. Step back and view the board from above, adjusting placement to perfect the symmetry.
 Pin
Pin 
My favorite memory of a dessert board came when my young nephew studied it for a full minute before choosing his first bite. He pointed to a macaron and said it looked like jewelry, then asked if he was allowed to eat it. That's when I knew we'd created something more than food—we'd made an experience. He still talks about that board.
The Art of Elegant Arrangement
Building a dessert board is less about cooking and more about composition. Think of it like arranging flowers or curating a gallery. The board is your canvas, fruit and pastries are your palette, and chocolate is your signature brushstroke. Color, height, and texture are your only tools, but they're powerful ones. When you step back and feel that moment of 'yes, that's beautiful'—you've got it. Trust that instinct. The most successful boards I've made weren't the ones where I followed a rigid plan, but rather where I allowed the ingredients themselves to guide me toward balance.
Timing and Preparation Strategy
The beauty of this recipe is that you can prep elements hours ahead without compromising quality. Wash and dry your fruit in the morning, store it in the refrigerator, and slice it just 30 minutes before assembly. Keep your pastries unwrapped and ready in a cool spot—they're shelf-stable and actually prefer staying dry. Melt your chocolate only in the final 15 minutes; this ensures it's at the perfect viscosity for drizzling and sets with that coveted matte finish. This timeline means you're never stressed; you're simply orchestrating a final 20-minute assembly where everything comes together.
Beyond the Basic Board
Once you've mastered the classic arrangement, this recipe becomes endlessly customizable. Think seasonally—add candied chestnuts in winter, fresh berries and white chocolate drizzles in summer. Consider your guests; swap the pistachios for toasted almonds, or omit them entirely for nut allergies. Add unexpected elements like honeycomb candy for crunch, candied citrus peel for depth, or Turkish delight for a Middle Eastern note. The framework stays the same; the creativity is entirely yours. This flexibility is why a dessert board works for intimate gatherings and large celebrations alike.
- For a chocolate lover's board, increase the chocolate elements—add chocolate-covered pretzels, dark chocolate shards, and intensify the drizzle.
- For a summer celebration, lean into fresh berries and citrus, add white chocolate for contrast, and scatter edible flowers generously.
- For dietary needs, swap traditional pastries for vegan macarons and dairy-free chocolate; the board remains stunning and inclusive.
 Pin
Pin A dessert board is proof that the most elegant, impressive creations often require no cooking at all—just care, intention, and an eye for beauty. It's a recipe that celebrates the art of assembly and reminds us that presentation is its own form of generosity.
Recipe Questions & Answers
- → How do I maintain the freshness of the fruit on the board?
Rinse fruit under cold water and pat dry thoroughly to avoid sogginess. Use only ripe, unblemished fruit and serve shortly after assembly for best texture and appearance.
- → What’s the best way to melt dark chocolate for drizzling?
Microwave chopped chocolate with coconut oil in 20-second bursts, stirring between each, until smooth and glossy. Let cool slightly before drizzling to prevent running.
- → How can I achieve a balanced and symmetrical presentation?
Arrange similarly sized fruit pieces in mirrored curves or lines, and cluster pastries and chocolates in matching patterns on each side of the board for visual symmetry.
- → Can I substitute pistachios for another garnish?
Yes, you can use chopped nuts like almonds or omit nuts entirely, replacing with extra edible flowers or seeds to maintain texture and color contrast.
- → What storage recommendations help preserve this display?
Store leftovers in airtight containers in the refrigerator for up to two days. Re-drizzle chocolate before serving if the glaze softens.
- → How do I prevent the chocolate drizzle from losing definition?
Allow melted chocolate to cool slightly to a fluid but not hot temperature before drizzling. Drizzle in thin lines and let set at room temperature.